These instructions can be followed after having X11 up and running as per the instructions in the second part of the Debian installation series, or at any time if you are running a different distribution and are just changing your network environment.
I have first seen the idea of running networking through pfSense discussed in this series of posts 1 by Manuel Timita and in this Linux specific post 2 by Radovan Brezular, many thanks to both of them for sharing their experiences and configuration.
I am running my actual physical internet firewall/gateway on 192.168.1.1, and will configure my internal pfsense-based VirtualBox network with the following topology:
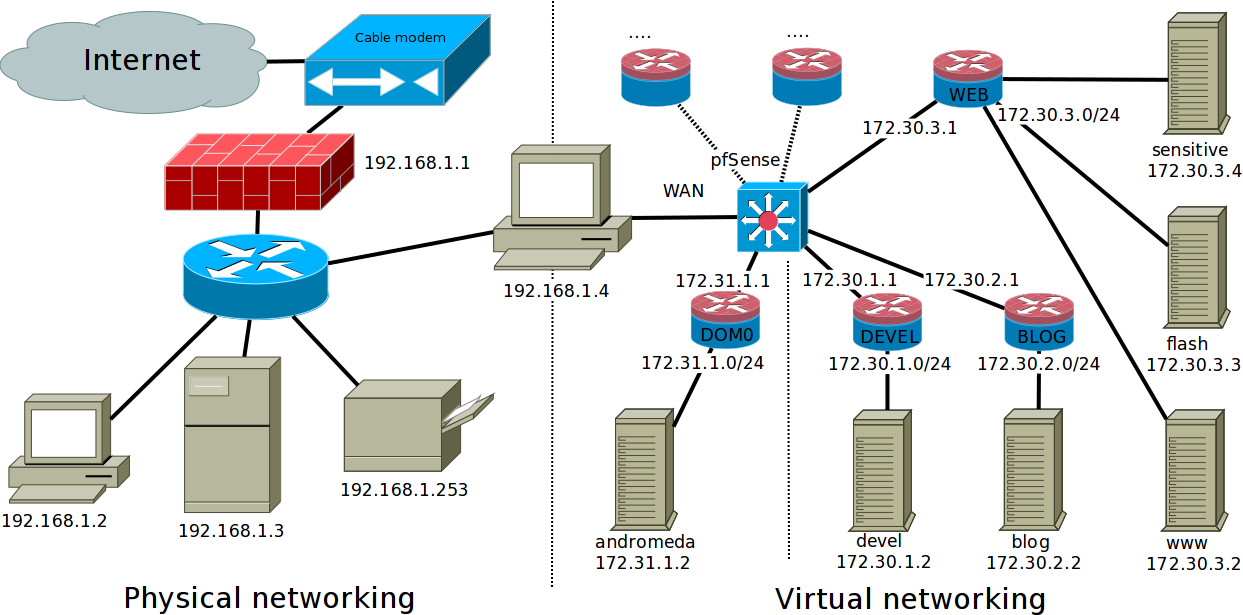
In this example 192.168.1.4 is my actual physical box, where we are installing pfSense and our VMs, the other 192.168.1.x hosts are just an example of what you could have in your physical network, as well as the internal pfSense networks that are listed.
In this set-up there is Dom0 network for the bare-metal access to pfSense, and various virtual networks for specific VMs, here a development VM, a blogging VM, and several VMs to be used for web browsing (say a normal browsing one, one with flash available, and another for more sensitive browsing like bank access etc.)
In order to configure pfSense a browser will be required later, so let’s install iceweasel in our Dom0.
VirtualBox installation
If you are not following my installation guide please install whatever version of VirtualBox your distribution supports, otherwise let’s grab it from jessie-backports, since it now includes VirtualBox 5.x, of course you can also just download it from the official site if you prefer running the latest available release.
note that you will see a message saying the virtualbox service installation failed, this is normal because the virtualbox modules have not been compiled yet at that point, the virtualbox service will be restarted later on, you can make sure by running systemctl status virtualbox.service after the installation completes
pfSense installation
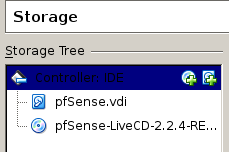
First of all you should grab the latest version of pfSense from the official distribution page 3. The image to get is the LiveCD with installer iso, either the i386 or amd64 isos will work, I will use the amd64 one.
After downloading the iso make sure you double check the checksum of the downloaded file, and reboot or shut down dhcpcd and disable your network insterface so you don’t have any networking running or configured.
systemd unit files
Let’s now create the unit files we are going to use to run the networking: in the files below I will use eno1 as the interface name, if your interface name is different just substitute it (you can find the name by running ip link) both in the commands below and inside vboxvm@.service.
First create the VM service at /etc/systemd/system/vboxvm@.service
[Unit]
Description=VBox Virtual Machine %i Service
Requires=systemd-modules-load.service
After=systemd-modules-load.service
Requires=vboxnetwork@eno1.service
After=vboxnetwork@eno1.service
Requires=virtualbox.service
After=virtualbox.service

[Service]
User=luser
Group=vboxusers
ExecStart=/usr/bin/VBoxHeadless -s %i
ExecStop=/usr/bin/VBoxManage controlvm %i savestate

[Install]
WantedBy=multi-user.target
this unit depends on the following networking service at /etc/systemd/system/vboxnetwork@.service, on the general systemd modules and on the virtualbox modules specifically.
[Unit]
Description=Network connectivity for virtualbox (%i)
Wants=network.target
Before=network.target
BindsTo=sys-subsystem-net-devices-%i.device
After=sys-subsystem-net-devices-%i.device

[Service]
Type=oneshot
RemainAfterExit=yes

ExecStart=/sbin/ip tuntap add mode tap tap1
ExecStart=/sbin/ip addr add 172.31.1.2/24 dev tap1
ExecStart=/sbin/ip link set tap1 up
ExecStart=/sbin/ip link set dev %i up
ExecStart=/sbin/route add default gw 172.31.1.1
ExecStart=/bin/mv /etc/resolv.conf /etc/resolv.conf.vboxnetwork
ExecStart=/bin/sh -c "/bin/echo 'nameserver 172.31.1.1' > /etc/resolv.conf"

ExecStart=/bin/mv /etc/resolv.conf.vboxnetwork /etc/resolv.conf
ExecStop=/sbin/ip link set dev %i down
ExecStop=/sbin/route del default gw 172.31.1.1
ExecStop=/sbin/ip addr flush dev tap1
ExecStop=/sbin/ip link set dev tap1 down
ExecStop=/sbin/ip tuntap del mode tap tap1

[Install]
WantedBy=multi-user.target
the networking service, which depends on our network interface, will bring up our virtual tap interface and bridge it to our physical adapter, it will also backup resolv.conf just in case and set it up so it is redirected to our future pfSense installation, which will be serving DNS as well.
The VM service can be used to run arbitrary headless VMs at boot and save them at shutdown, it will be used to start up our pfSense virtual machine after the networking service is started.
Let’s now enable the network service and start it to prepare for the actual pfSense virtual machine installation
1: lo: <LOOPBACK,UP,LOWER_UP> mtu 65536 qdisc noqueue state UNKNOWN mode DEFAULT group default
    link/loopback 00:00:00:00:00:00 brd 00:00:00:00:00:00
2: enp9s0: <BROADCAST,MULTICAST,UP,LOWER_UP> mtu 1500 qdisc pfifo_fast state UP mode DEFAULT group default qlen 1000
    link/ether xx:xx:xx:xx:xx:xx brd ff:ff:ff:ff:ff:ff
3: eno1: <BROADCAST,MULTICAST,UP,LOWER_UP> mtu 1500 qdisc pfifo_fast state UP mode DEFAULT group default qlen 1000
    link/ether xx:xx:xx:xx:xx:xx brd ff:ff:ff:ff:ff:ff
4: tap1: <BROADCAST,MULTICAST,UP,LOWER_UP> mtu 1500 qdisc pfifo_fast state UP mode DEFAULT group default qlen 500
    link/ether xx:xx:xx:xx:xx:xx brd ff:ff:ff:ff:ff:ff
if everything worked correctly you should now see your tap1 device as well as your normal network interface(s) listed if you run ip link
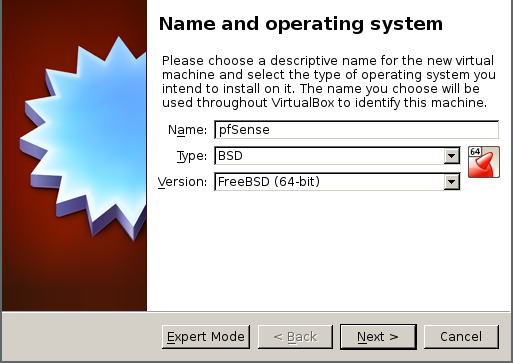
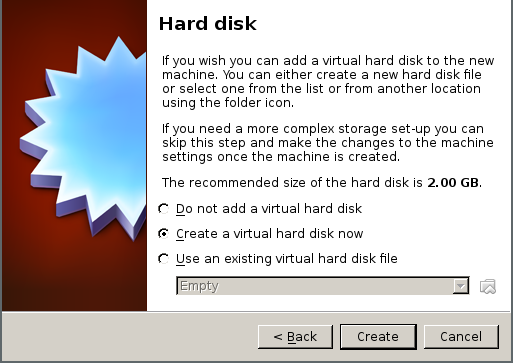
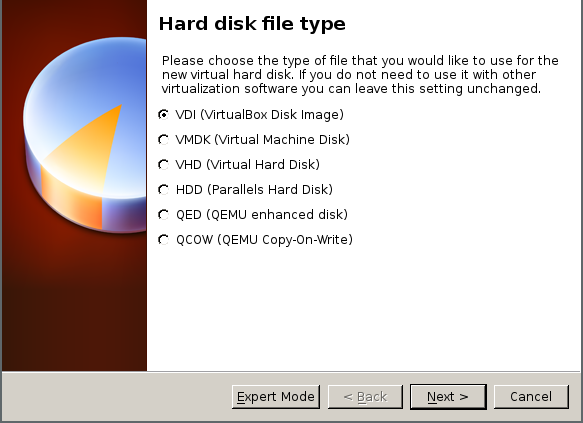
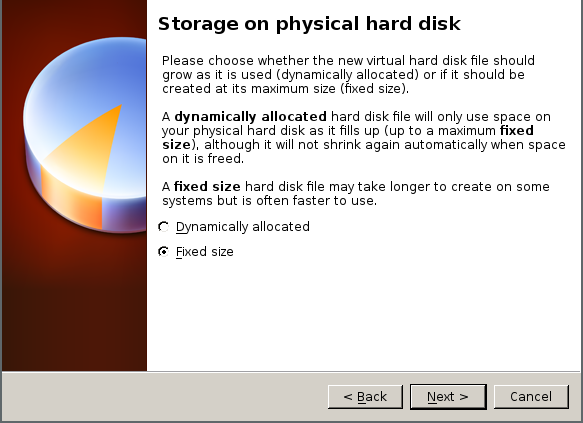
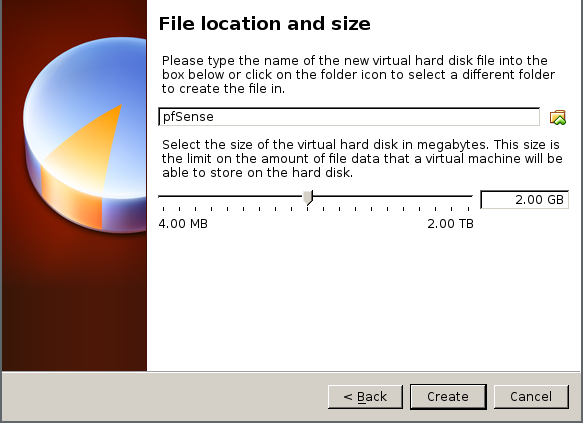
pfSense virtual machine
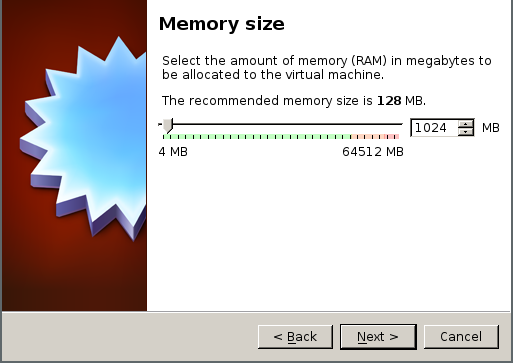
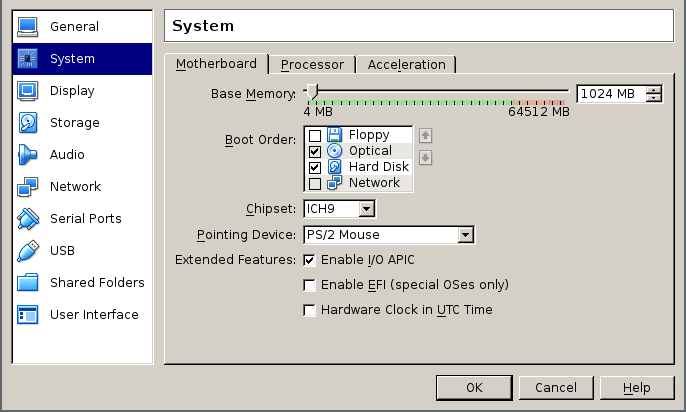
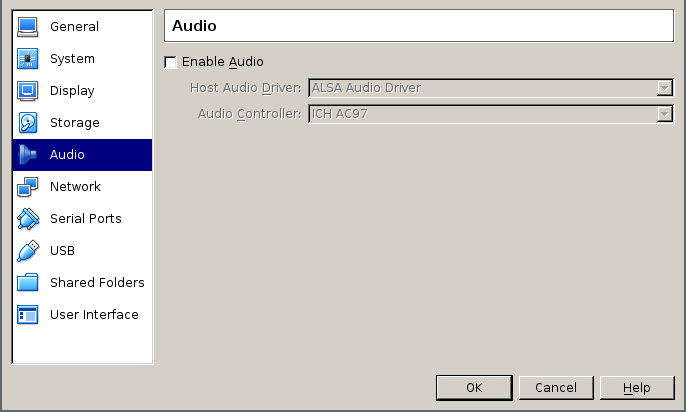
It is now time to create a VM for pfSense in virtualbox, here are some screenshots with the relevant settings, note I have plenty of RAM in my desktop so I went with one gigabytes of ram for it, but it should work just fine with 512 megs, or even 256 in a pinch although in that case you might have to be a bit more careful with the pfSense options you choose.
The VDI disk size to use is also up to you, the more space the more logfiles you will be able to store, as well as possibly having more storage for any extra packages you install (say, a squid proxy, which can definitely use the extra space if you select disk-based caching)
The machine should be created with as many network interfaces you need for your particular environment, I like having a lot of choices when it comes to locking down specific VMs so I created my Virtualbox pfSense installation with the ICH9 chipset and 16 nics.
First of all set up the basics
Now configure the chipset and other information, set up the initial two network interfaces to bridged and connected to your real NIC and to the TAP interface we created earlier
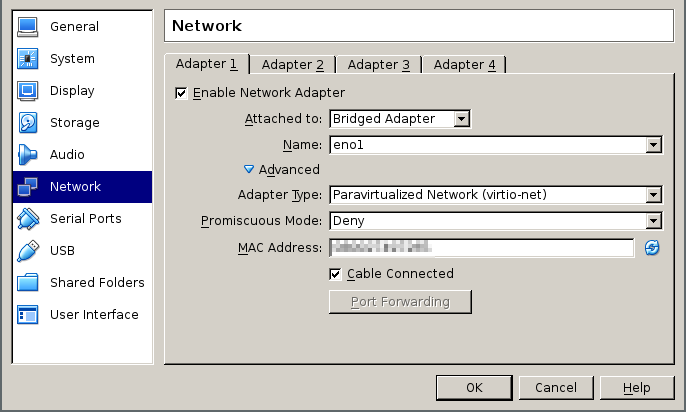

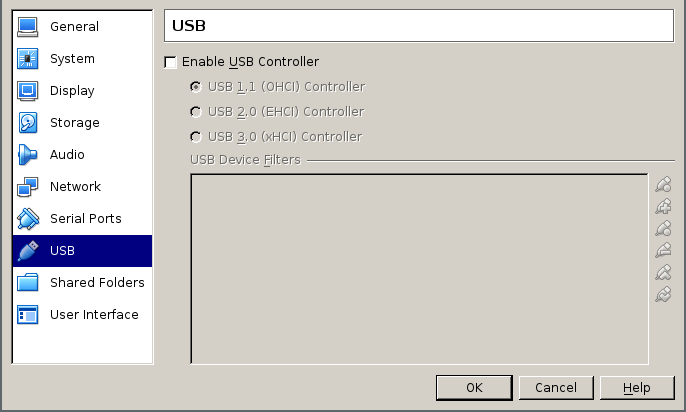
the other network interfaces instead will be created on the command line, since the VirtualBox GUI does not allow to specify more than 4 NICs. All of them should be set to run on internal networks and of type virtio.
After this is done let’s start up the VM and actually install pfSense in the next part of the tutorial.
- Initial release - 2016-01-01
- New highlighting for commands - 2017-12-03