
In the previous part of this tutorial we started fleshing out our pfSense configuration using its GUI, let’s continue
DNS resolution
You could simply create a pass rule in your pfSense configuration to allow each individual client to query either the internet or your local external DNS servers directly, however I find it useful and more secure to have the pfSense installation also serve as a the single DNS resolver for all clients.
pfSense offers two options to configure this, its DNS resolver and its DNS forwarder, the DNS resolver is more full featured and offers you a lot more flexibility, however for my usage I have found the DNS forwarder to be good enough, I set it up to forward everything to my internal DNS server by default
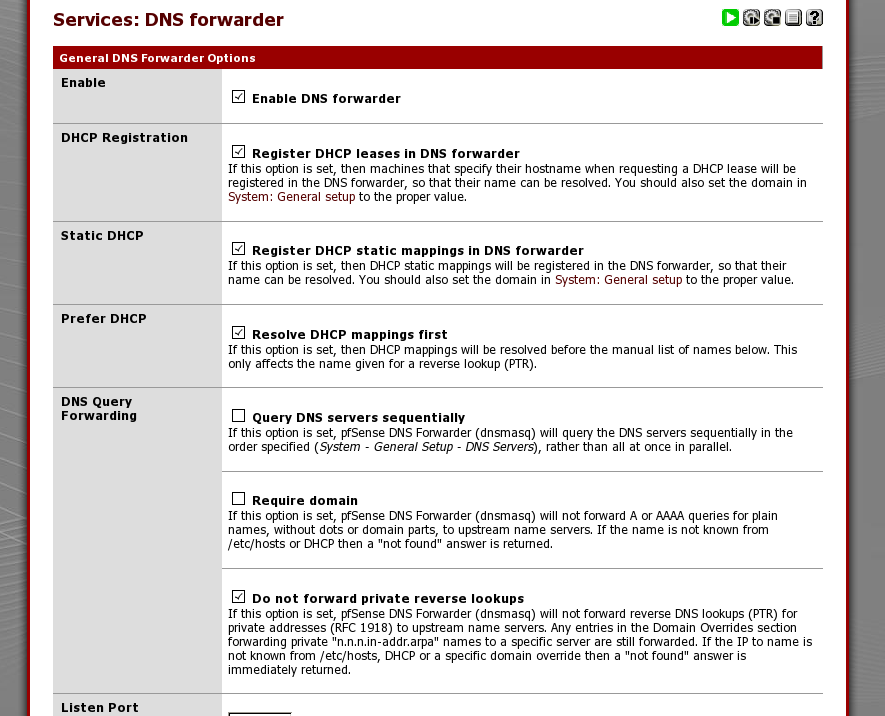
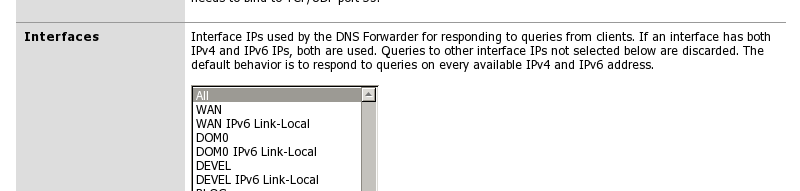
the DNS forwarder by default will listen on all interfaces
and since it is quite useful when creating firewall rules, I set it up to log all queries

when you are trying to add a firewall rule to enable something that is blocked, you would want to know what the host name is that was trying to be contacted, in order to create an alias.
If one reverse-resolves from the firewall logging screen these days usually one ends up getting AWS or CDN hosts, which are not very useful as the same CNAME could be mapped to several of them for load balancing purposes and creating a rule for one would still leave all the others blocked.
It is much more useful and foolproof to see which address was blocked in the firewall log and look it up among the DNS queries to see what domain name returned it, and add that hostname to one of your firewall aliases instead.
Firewall rules
Let’s now start adding firewall rules to our interfaces, first of all let’s fix the floating rules panel.
Floating rules
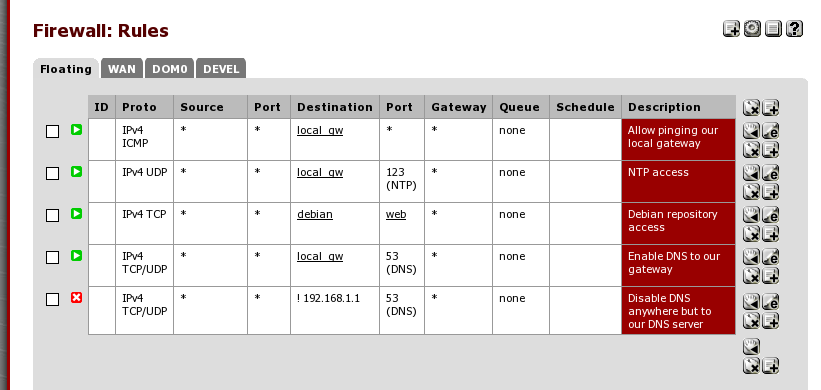
Floating rules are firewall rules that are evaluated all the time first, so you should be careful not to add anything here that could jeopardize the isolation of your containers. Here I only have rules that allow a few simple things:
- ICMP access to our local interface gateway for network debugging
- DNS access to our local gateway
- http/https access to our local debian mirror(s)
- ntp access to the local pfSense installation
- DNS access allowed only to our upstream DNS server
all rules but the last rule are on all the local interfaces and incoming, the last rule instead is on the WAN interface and outgoing, depending on your resolver settings you might not want this, personally I want to ensure no DNS traffic leaves unless it is directed to my local network DNS server. The last rule is also set as ‘quick’, while the others are left as default so they can be overridden by individual interface rules if needed.
Here is what they look like once created
DOM0 rules
The floating rules intentionally do not contain any addresses used by DOM0, meaning the 172.31.1.1 subnet, in general we want our DOM0 to have access to everywhere in our local network
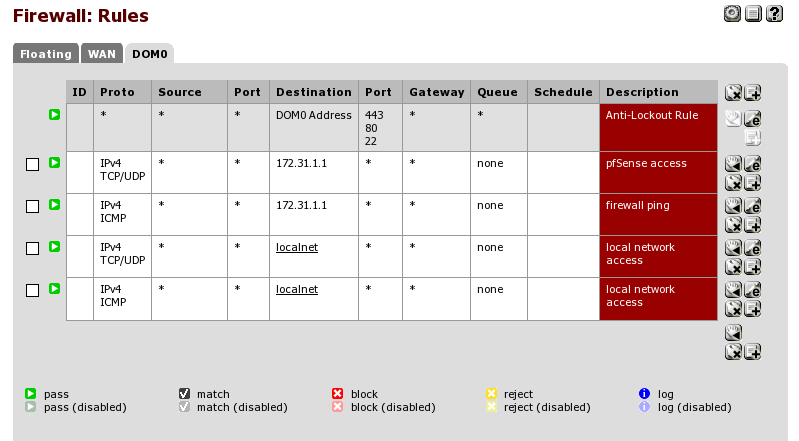
so we add the localnet alias with no restrictions (which also covers our 192.168.1.0/24 existing WAN network) and an additional rule enabling full access to pfSense as well, for ping and dns purposes.
Application rules
The application rules are really up to the usage of the particular VMs connected to that network, if you are using a VM for your banking, you would probably try to limit it to only the relevant addresses, although it can sometimes be time consuming to do so nowadays with a lot of banks using CDNs and offsite assets. Development VMs could be limited to, say, github, and so on.
Creating a new internal network
When you are going to run VMs that should be separate from each other, you should be creating a new network in VirtualBox and pfSense, as described below to do this vboxmanage can be used
after this is done you can go back to your pfSense installation and set up the network there as we did before.
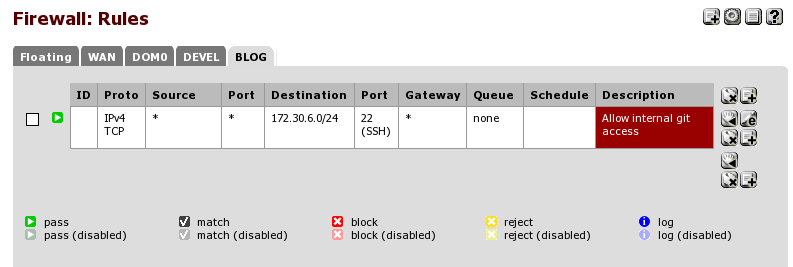
In terms of deciding if a separate network is warranted for a particular VM it really depends from its usage, if, say, a VM is being set up to run a git server, it probably would work best in a separate network to be able to create access rules to it from the other VMs, for example like this, assuming the git server is in the 172.30.6.0/24 network
if you want to set up, for example, a few docker VMs instead it might make sense to just have a DOCKER network where all your docker VMs live, it’s really up to you.
After setting up pfSense it’s time to go back to our Debian installation and flesh it out a bit more.
- Initial release - 2016-01-01
- New highlighting for commands - 2017-12-03