
As you might have noticed from the updated link at the bottom, this blog is now running on Hugo, switching from Pelican implied mainly rewriting the custom templates I had, and making them output as close HTML as possible to the old ones in order minimize any CSS changes. Pandoc was also quite helpful to get the initial ReStructuredText to Markdown conversion done for the post contents, requiring mostly only fixes to hrefs and links in general.
I find Hugo to be working very well, the recompilation of the site is extremely fast, and writing posts with near-instant live-reload by simply running hugo server –disableFastRender in the background is very nice. When needing to work on CSS I only have to also run compass watch for instant CSS reload as well.
Besides theme-related changes, the only source modification I chose to do was removing rel=“footnote” from my local russross/blackfriday/html.go in order to avoid an error in the W3C validator, note this is an open issue in blackfriday at the moment which might get tackled at some point, however some existing css might depend on having this, so it is not as clear-cut for the maintainer to decide to change the default behavior.
I have also taken the time to add some more css to create some pseudo “terminal windows” to make it more obvious when commands are entered, what their output is, and if there was some comment related to that. I did not want to use actual screenshots as that would prevent copy-pasting from them.
Debian Stretch
The current stable version of Debian has been stretch for a while, so the guides on this site required some small tweaking. I have decided to leave all the installation commands to still reference jessie just in case somebody had been following the guide as it was written, I have just added mentions of stretch when needed. The vast majority of the instructions remained the same, and most of the time it was just a matter of using stretch/stretch-backports in the aptitude lines to use the new distribution.
Using the non-debian NVidia driver
I have recently acquired a very cheap second-hand Xeon HP Z420 computer (it is amazing how a whole six-core server with 16GB of RAM is significantly cheaper than a mid-range video card these days) and I have been using it to run virtualization-related development tasks I cannot easily run on my main VirtualBox-based linux desktop (future posts will be related to this).
Running on bare-metal also allows me to experiment with CUDA more easily. When starting to do this I realized the drivers and CUDA as available in Debian are unfortunately not the latest (CUDA 9 is available at the time of this writing, but stretch is still on CUDA 8), and so I decided to investigate a bit how to run the non-Debian distribution of the drivers, and how to set it up so that it can be run on-demand depending on which kernel I am booting into, as for example when using Xen I do not typically need CUDA or 3d acceleration in general, and so prefer to use Nouveau.
In order to switch to the NVidia distribution it is easier to start with an already installed nvidia-driver package as discussed here as well as an installed CUDA distribution and nvidia driver dependencies
Afterwards one should download the latest drivers and CUDA from NVidia and save them somewhere.
Now you should remove all the installed NVidia packages and their automatically installed dependencies
but do keep the list of removed packages in mind in case you have to reinstall any to get the NVidia driver to compile (I didn’t, but you never know).
At this point you should reboot and make sure to not be in X11 to continue with the installation. Also note the below assumes you have only an NVidia card in your system, if you, say, use integrated graphics for your display and NVidia only for compute, you would need to for example specify –no-opengl-files to the NVidia driver installation command line to avoid your main video card opengl driver to be clobbered.
You should also now install any needed mesa libraries, before the actual driver to make sure it can overwrite them with NVidia-specific ones if needed.
afterwards you can install CUDA. Note the CUDA package usually contains a sometimes not as recent version of the drivers, so let’s first unpack it and only install CUDA and its samples.
after this you can add /usr/local/cuda/bin to your PATH and try a random sample to make sure everything works. Note that unfortunately as of this writing the findglib.mk shipped by NVidia does not support debian, so you should patch it by first creating a file containing this patch somewhere, say /tmp/findgllib.patch
--- ../../6_Advanced/FunctionPointers/findgllib.mk	2017-11-27 11:24:45.437161595 -0800
+++ findgllib.mk	2017-11-27 13:30:13.615865142 -0800
@@ -60,6 +60,7 @@
     RHEL   = $(shell echo $(DISTRO) | grep -i 'red\|rhel' >/dev/null 2>&1; echo $$?)
     CENTOS = $(shell echo $(DISTRO) | grep -i centos      >/dev/null 2>&1; echo $$?)
     SUSE   = $(shell echo $(DISTRO) | grep -i suse        >/dev/null 2>&1; echo $$?)
+    DEBIAN = $(shell echo $(DISTRO) | grep -i debian      >/dev/null 2>&1; echo $$?)
     ifeq ("$(UBUNTU)","0")
       ifeq ($(HOST_ARCH)-$(TARGET_ARCH),x86_64-armv7l)
         GLPATH := /usr/arm-linux-gnueabihf/lib
@@ -81,6 +82,11 @@
         DFLT_PATH ?= /usr/lib
       endif
     endif
+    ifeq ("$(DEBIAN)","0")
+      GLPATH    ?= /usr/lib/x86_64-linux-gnu
+      GLLINK    ?= -L/usr/lib/x86_64-linux-gnu
+      DFLT_PATH ?= /usr/lib/x86_64-linux-gnu
+    endif
     ifeq ("$(SUSE)","0")
       GLPATH    ?= /usr/X11R6/lib64
       GLLINK    ?= -L/usr/X11R6/lib64
and then patching all the findgllib.mk files in the samples distribution
note that however as of this writing some of the EGL samples do not seem to work due to an issue with the EGL header files not being up-to-date, a discussion about this is here talking about Ubuntu but the same issue does happen in debian. This means you might want to disable these samples for the time being
You should now be able compile all the samples by running make in the toplevel directory.
Note again, due to the fact that libGL can both be provided by the NVidia driver and mesa, you might need to redo the above driver installation if the wrong GL library ends up being used. You might also have to reinstall the driver if you update the Debian packages and end up with the wrong GL libraries installed.
Please also keep in mind the official CUDA installation instructions for additional information.
Blacklisting nouveau
The common way of preventing Nouveau to run is to add a blacklist file in /etc/modprobe.d, this works well for the typical scenario where you always boot the same type of kernel and work on your computer graphically, however if you occasionally also run Xen, for example, besides a normal kernel, it might be beneficial to be able to choose between nouveau and the NVidia driver at boot time depending on which kernel you are running.
This can be easily done by having the relevant blacklist directive in /etc/default/grub instead, for example for a xen/nouveau normal/nvidia install one could have something like
_CMDLINE_LINUX="cryptdevice=/dev/disk/by-uuid/xxxxxxxx-xxxx-xxxx-xxxx-xxxxxxxxxxxx:lvm:allow-discards net.ifnames=1"
GRUB_CMDLINE_XEN_DEFAULT="dom0_mem=512M,max:512M dom0_max_vcpus=1 dom0_vcpus_pin"
GRUB_CMDLINE_LINUX="$_CMDLINE_LINUX modprobe.blacklist=nouveau"
GRUB_CMDLINE_LINUX_XEN_REPLACE="$_CMDLINE_LINUX modprobe.blacklist=nvidia,nvidia-drm,nvidia-modeset"
and if running without an xorg.conf file things should basically just work. If an xorg.conf file is needed, you would likely need to create a systemd unit that would switch the correct file depending on the kernel that was booted or by the loaded modules.
Note this approach might not work for debian-installed nvidia drivers, as they might create files in /etc/modprobe.d/ with an unconditional install directive for the nvidia driver, which means that even if blacklisted it would still be loaded. As of this writing the NVidia provided drivers do not do this, but please do always check /etc/modprobe.d after changing drivers or updating packages.
Resizing your encrypted VirtualBox disks
When setting up the VirtualBox disks for your VMs as discussed in earlier parts of this guide, you might be conservative and find out later that you would want to have a bit more space; the resizing process has to happen across many different layers, the VDI image itself, the VM disk partition, the LUKS container, the LVM volume and finally the ext4fs filesystem.
The rest of these instructions assume that your disk layout is the same as discussed in the previous posts, i.e. a single LUKS container spanning the whole disk, with LVM volumes inside it, if this is not the case for you you would need to likely do something else. Also as usual when dealing with this kind of operations data loss is always a risk, so always make sure your back-ups are up to date.
Let’s take an existing VM, called staging, and resize its disk to have more space, currently the VDI is set to 24G, and you can see this inside the booted VM
Filesystem     Type      Size  Used Avail Use% Mounted on
/dev/dm-2      ext4       24G  2.9G   20G  13% /
udev           devtmpfs   10M     0   10M   0% /dev
tmpfs          tmpfs     1.6G  8.5M  1.6G   1% /run
tmpfs          tmpfs     4.0G     0  4.0G   0% /dev/shm
tmpfs          tmpfs     5.0M     0  5.0M   0% /run/lock
tmpfs          tmpfs     4.0G     0  4.0G   0% /sys/fs/cgroup
tmpfs          tmpfs     801M  4.0K  801M   1% /run/user/1000
let’s extend it to, say, 30 gigs as an example. First of all shutdown the vm and outside of virtualbox in your Dom0 backup the vdi, you can also just in case checksum it to make sure the back-up is fine.
ls -lh
total 4.5G
drwx------ 2 luser luser     4.0K Jan 14 12:46 Logs
-rw------- 1 luser luser     4.5G Jan 14 12:59 staging-disk1.vdi
-rw------- 1 luser luser      20K Jan 14 12:59 staging.vbox
-rw------- 1 luser luser      20K Jan 14 12:59 staging.vbox-prev
f3a5.....fae64 staging-disk1.vdi
f3a5.....fae64 staging-disk1.vdi
the back-up looks ok, so let’s resize the VDI first on the VirtualBox level, this will be pretty much instant as this VDI is set to be sparse so VirtualBox does not need to do any disk allocation really
0%...10%...20%...30%...40%...50%...60%...70%...80%...90%...100%
it’s now time to boot the VM again to work on its filesystem, which has to be unmounted in general. Let’s use GParted, we can insert the iso in the VM using the GUI or via vboxmanage, if using vboxmanage let’s see where the virtual DVD drive is attached first, attach the GParted iso after in the correct place and start the VM.
Storage Controller Name (0):            IDE
IDE (1, 0): Empty
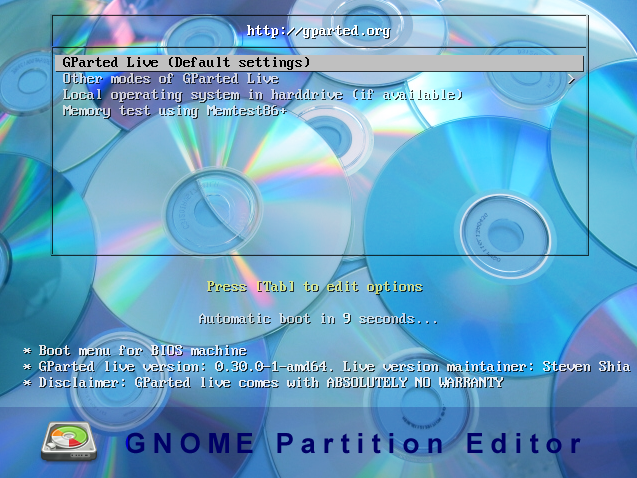
GParted is fairly straightforward, at boot just choose the GParted Live option
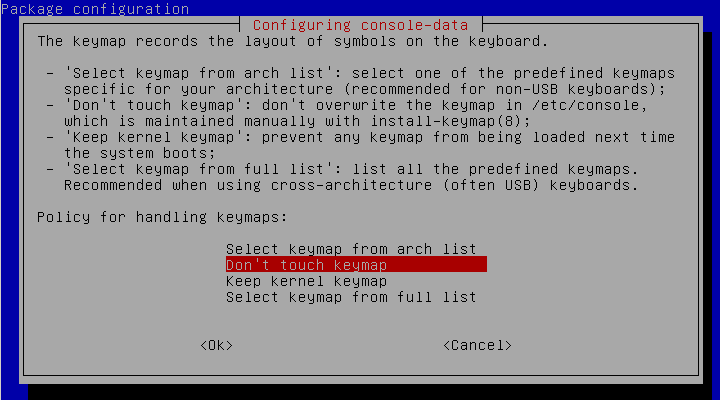
and after a couple of screens dealing with keymaps you can select to start X

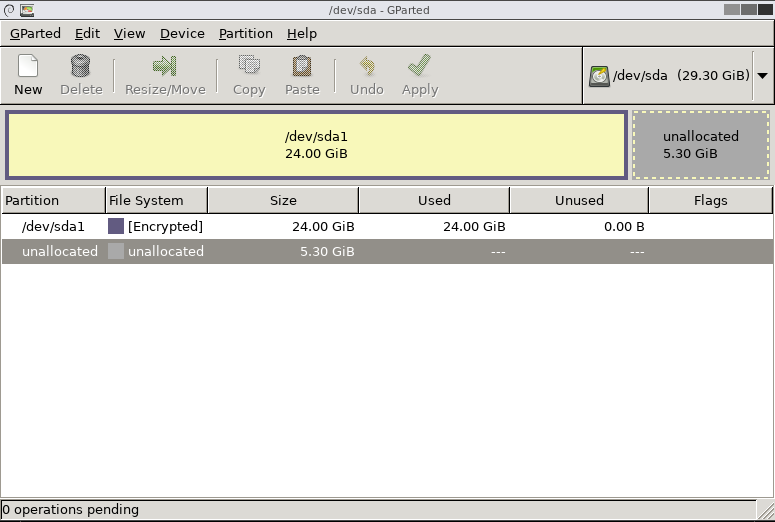
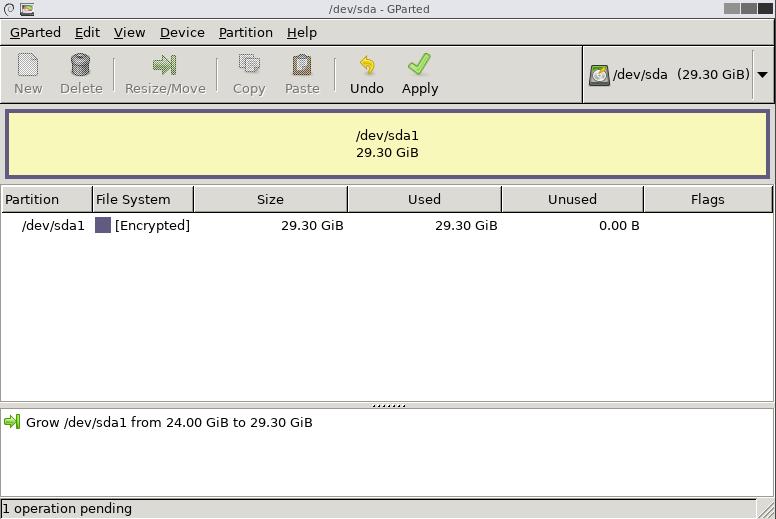
GParted itself should launch automatically and show you your disk, with the extra space unallocated.
you can select your partition, click on the Resize/Move button and extend it to the maximum, in this case just under 30GB
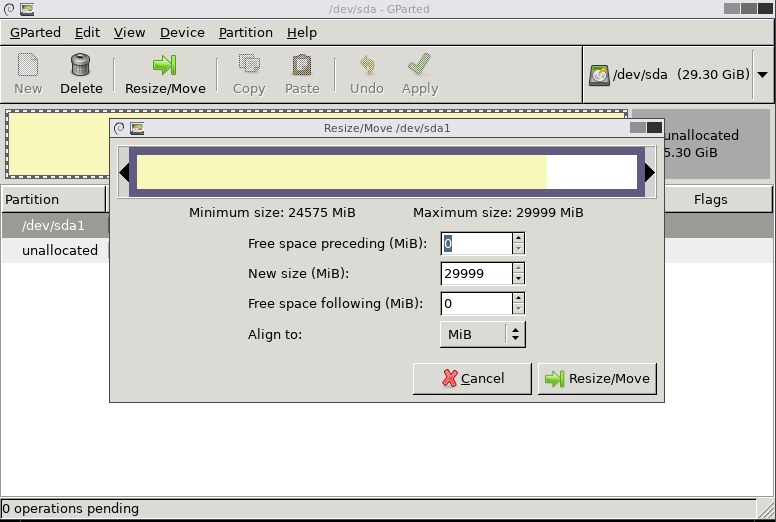
after clicking on Resize/Move in the window, you will be sent back to the previous screen, but with a ‘Grow’ operation pending, press Apply and your disk will be resized
This takes care of the disk layer resizing, we now have two additional layers to take care of, LUKS and LVM. Let’s first resize the LUKS container. The next steps should be doable right inside GParted, just quit the partition editor and launch the terminal, or you can also of course use a normal Debian LiveCD, just make sure to apt-get lvm2 and cryptsetup to get the needed executables in that case.
NAME   MAJ:MIN RM  SIZE RO TYPE MOUNTPOINT
loop0    7:0    0  2.6G  1 loop /lib/live/mount/rootfs/filesystem.squashfs
sda      8:0    0 29.3G  0 disk
└─sda1   8:1    0 29.3G  0 part
sr0     11:0    1  2.8G  0 rom  /lib/live/mount/medium
everything should be fine on the OS if lsblk recognizes your new partition size, if not you might want to reboot.
Let’s unlock our LUKS container and find our LVM volumes, in this case under the dvg volume group.
Enter passphrase for /dev/sda1:
  WARNING: Failed to connect to lvmetad. Falling back to device scanning.
  Reading all physical volumes.  This may take a while...
  Found volume group "dvg" using metadata type lvm2
  WARNING: Failed to connect to lvmetad. Falling back to device scanning.
  2 logical volume(s) in volume group "dvg" now active
We can resize the LUKS container now with cryptsetup
and the LVM container with pvresize
  WARNING: Failed to connect to lvmetad. Falling back to device scanning.
  Physical volume "/dev/mapper/lvm" changed
  1 physical volume(s) resized / 0 physical volume(s) not resized
if you don’t remember the name of the LVM volume you want to extend, you can get it via lvdisplay, in this case I am growing the root volume
.......

  --- Logical volume ---
  LV Path                /dev/dvg/root
  LV Name                root
  VG Name                dvg
  LV UUID                jDitXk-X0Ys-OWdu-j8xQ-oB9W-0GQz-eXY3bF
  LV Write Access        read/write
  LV Creation host, time debian, 2015-11-11 23:50:22 +0000
  LV Status              available
  # open                 0
  LV Size                23.75 GiB
  Current LE             6079
  Segments               1
  Allocation             inherit
  Read ahead sectors     auto
  - currently set to     256
  Block device           254:2

........
  WARNING: Failed to connect to lvmetad. Falling back to device scanning.
  Size of logical volume dvg/root changed from 23.75 GiB (6079 extents) to 29.04 GiB (7435 extents).
  Logical volume dvg/root successfully resized.
the LVM layer is also now taken care of, the last one to be taken care of is the filesystem layer, so let’s fsck the filesystem and resize it.
e2fsck 1.43.4 (31-Jan-2017)
Pass 1: Checking inodes, blocks, and sizes
Pass 2: Checking directory structure
Pass 3: Checking directory connectivity
Pass 4: Checking reference counts
Pass 5: Checking group summary information
/dev/dvg/root: 107109/1556480 files (0.1% non-contiguous), 880027/6224896 blocks
resize2fs 1.43.4 (31-Jan-2017)
Resizing the filesystem on /dev/dvg/root to 7613440 (4k) blocks.
The filesystem on /dev/dvg/root is now 7613440 (4k) blocks long.
and we are done! We can now unmount everything and shutdown GParted
  WARNING: Failed to connect to lvmetad. Falling back to device scanning.
  0 logical volume(s) in volume group "dvg" now active
we should now take out the dvd from the VM and boot normally
and after booting inside the VM now you can see the partition is larger, we have 5 more gigs available
Filesystem     Type      Size  Used Avail Use% Mounted on
/dev/dm-2      ext4       29G  2.9G   25G  11% /
udev           devtmpfs   10M     0   10M   0% /dev
tmpfs          tmpfs     1.6G  8.5M  1.6G   1% /run
tmpfs          tmpfs     4.0G     0  4.0G   0% /dev/shm
tmpfs          tmpfs     5.0M     0  5.0M   0% /run/lock
tmpfs          tmpfs     4.0G     0  4.0G   0% /sys/fs/cgroup
tmpfs          tmpfs     801M  4.0K  801M   1% /run/user/1000
As an alternative, rather than extending the partition you could create a new partition and extend the LVM volume group on it as discussed in this blog post however this would complicate things slightly with LUKS as you would have to create an additional container on the new partition and make sure it’s unlocked and available for LVM.
- Initial release - 2017-11-27
- Added resizing - 2018-01-14